If you had to talk to several people all over the country, it would be inconvenient to physically be there for each conversation; instead, you might call them – much more practical. The same goes for servers. If you have many servers, it wouldn’t make sense to log in to each of them locally – You would need to physically be there with all the peripherals. So, what alternative do you have?
With servers, it’s common to set up a method for logging into it remotely so you don’t need local access (Also, this way, multiple users can log in simultaneously). That’s where the SSHd service comes in. Installing the SSHd service on a linux computer will enable you to log in to a shell remotely, and securely, so you can manage one or multiple servers from your local workstation.
OVERVIEW
In this tutorial, we’ll install the SSHd (Secure SHell Daemon) service. This will enable us to log into the CentOS 7 server remotely from our laptop, desktop, or any other computer on the network. First, we’ll check the network setup; next, we’ll do the SSHd installation and configuration; then, we’ll use the actual service to log in remotely.
NOTE: Service/Daemon
A service, sometimes called a “daemon”, is software that runs on a computer and “serves” users by processing their requests.
Outline
- Check Network
- Check Server’s Internet Connectivity
- Identify Server’s IP Address
- SSHd setup
- Install SSHd Server Package
- Update the SSHd Server Package
- Verify SSHd Service Status
- Log In Remotely
- Open Linux Shell
- SSH into the Remote Host
Prerequisites
- Basic Windows Knowledge
- A Centos 7 Installation on the network
- A Windows workstation with a Linux Terminal
- User and Group Modification
- How to Edit Plaintext Files
CHECK NETWORK
Check Server’s Internet Connectivity
First, on the Linux computer, check to see if you can reach the Internet by pinging any available website. To do so, log in to the Linux computer and execute the following command: ping -c5 <Domain>.
[penguin@centos07 ~]$ ping -c5 google.com
PING google.com (172.217.2.238) 56(84) bytes of data.
64 bytes from dfw28s01-in-f14.1e100.net (172.217.2.238): icmp_seq=1 ttl=117 time=30.0 ms
64 bytes from dfw28s01-in-f14.1e100.net (172.217.2.238): icmp_seq=2 ttl=117 time=24.2 ms
64 bytes from dfw28s01-in-f14.1e100.net (172.217.2.238): icmp_seq=3 ttl=117 time=25.9 ms
64 bytes from dfw28s01-in-f14.1e100.net (172.217.2.238): icmp_seq=4 ttl=117 time=22.9 ms
64 bytes from dfw28s01-in-f14.1e100.net (172.217.2.238): icmp_seq=5 ttl=117 time=28.5 ms

--- google.com ping statistics ---
5 packets transmitted, 5 received, 0% packet loss, time 4104ms
rtt min/avg/max/mdev = 22.996/26.356/30.049/2.616 ms
If you get errors, check the computer’s network connection.
Identify Server’s IP Address
Later on, you’ll need to know this remote host’s IP address to log into it. So, find the IP by running either of the following commands: hostname -I or ip a.
[penguin@centos07 ~]$ hostname -I
10.0.0.2
[penguin@centos07 ~]$ ip a
1: lo: <LOOPBACK,UP,LOWER_UP> mtu 65536 qdisc noqueue state UNKNOWN group default qlen 1000
    link/loopback 00:00:00:00:00:00 brd 00:00:00:00:00:00
    inet 127.0.0.1/8 scope host lo
       valid_lft forever preferred_lft forever
    inet6 ::1/128 scope host
       valid_lft forever preferred_lft forever
2: enp0s3: <BROADCAST,MULTICAST,UP,LOWER_UP> mtu 1500 qdisc pfifo_fast state UP group default qlen 1000
    link/ether 09:00:28:93:49:7g brd ff:ff:ff:ff:ff:ff
    inet 10.0.0.2/32 brd 10.0.0.2 scope global noprefixroute enp0s3
       valid_lft forever preferred_lft forever
    inet6 fe80::ab97:67ba:1feb:d301/64 scope link noprefixroute
       valid_lft forever preferred_lft forever
In the above examples, you can see that the local IP is “10.0.0.2”.
SSHd SETUP
Install SSHd Server Package
Use the yum command to install the SSHd service. If prompted, enter your user’s password as well: sudo yum -y install <SoftwarePackage>.
[penguin@centos07 ~]$ sudo yum -y install openssh-server
Loaded plugins: fastestmirror
Determining fastest mirrors
 * base: centos-distro.1gservers.com
 * extras: mirror.rackspace.com
 * updates: mirror.rackspace.com
...
NOTE: Commonplace
Since the SSH protocol is so common on Linux systems, there’s a good chance that your server already has SSHd on it. Nevertheless, attempting to install the SSHd service again will simply either (1) update the software or (2) you’ll just get a message stating “Nothing to do” because it’s already installed and updated.
Update the SSHd Server Package
Afterwards, even though SSHd and its dependencies are likely already up-to-date, ensure the SSHd server software is updated by running the following command: sudo yum -y update <SoftwarePackage>.
[penguin@centos07 ~]$ sudo yum -y update openssh-server
Loaded plugins: fastestmirror
Loading mirror speeds from cached hostfile
 * base: centos-distro.1gservers.com
 * extras: mirror.rackspace.com
 * updates: mirror.rackspace.com
No packages marked for update
Verify SSHd Service Status
Then, we need to check if the SSHd service is running: systemctl status <Service>.
[penguin@centos07 ~]$ systemctl status sshd
● sshd.service - OpenSSH server daemon
   Loaded: loaded (/usr/lib/systemd/system/sshd.service; enabled; vendor preset: enabled)
   Active: active (running) since Sat 2020-07-18 10:40:28 EDT; 5h 8min ago
     Docs: man:sshd(8)
           man:sshd_config(5)
 Main PID: 1144 (sshd)
   CGroup: /system.slice/sshd.service
           └─1144 /usr/sbin/sshd -D

Jul 18 10:40:28 centos07.domain.lan systemd[1]: Starting OpenSSH server daemon...
Jul 18 10:40:28 centos07.domain.lan sshd[1144]: Server listening on 0.0.0.0 port 22.
Jul 18 10:40:28 centos07.domain.lan sshd[1144]: Server listening on :: port 22.
Jul 18 10:40:28 centos07.domain.lan systemd[1]: Started OpenSSH server daemon.
Next to Active:, it should say active (running). If not, try restarting the service and checking again: sudo systemctl restart <Service>.
[penguin@centos07 ~]$ sudo systemctl restart sshd
[penguin@centos07 ~]$ systemctl status sshd
● sshd.service - OpenSSH server daemon
   Loaded: loaded (/usr/lib/systemd/system/sshd.service; enabled; vendor preset: enabled)
   Active: active (running) since Sat 2020-07-18 15:49:55 EDT; 4s ago
     Docs: man:sshd(8)
           man:sshd_config(5)
 Main PID: 1868 (sshd)
   CGroup: /system.slice/sshd.service
           └─1868 /usr/sbin/sshd -D

Jul 18 15:49:55 centos07.domain.lan systemd[1]: Starting OpenSSH server daemon...
Jul 18 15:49:55 centos07.domain.lan sshd[1868]: Server listening on 0.0.0.0 port 22.
Jul 18 15:49:55 centos07.domain.lan sshd[1868]: Server listening on :: port 22.
Jul 18 15:49:55 centos07.domain.lan systemd[1]: Started OpenSSH server daemon.
LOG IN REMOTELY
Open Linux Shell
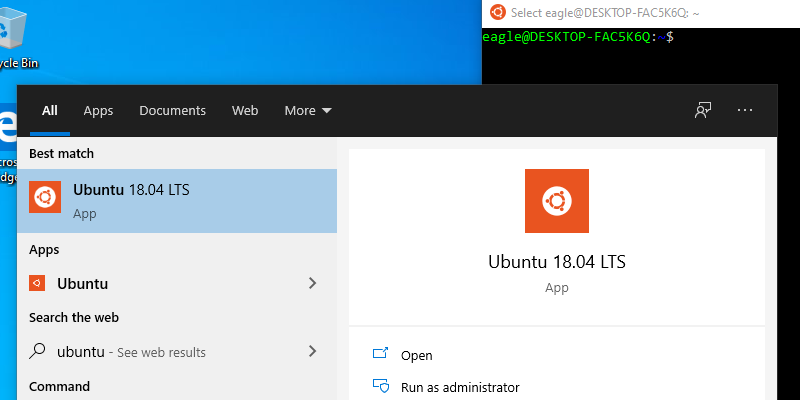
Now, from your Windows machine, you’ll need a way to SSH into the remote CentOS 7 server; so ensure you have a Linux shell installed. Go ahead and open up your preferred shell now.

SSH into the Remote Host
Next, using the IP address from earlier, check to see if you can reach the server over the network (if ping fails, it doesn’t necessarily mean you won’t be able to SSH into the server): ping -c3 <IPaddress>.
user@laptop:~$ ping -c3 10.0.0.2
PING 10.0.0.2 (10.0.0.2) 56(84) bytes of data.
64 bytes from 10.0.0.2: icmp_seq=1 ttl=64 time=0.662 ms
64 bytes from 10.0.0.2: icmp_seq=2 ttl=64 time=0.689 ms
64 bytes from 10.0.0.2: icmp_seq=3 ttl=64 time=0.542 ms

--- 10.0.0.2 ping statistics ---
3 packets transmitted, 3 received, 0% packet loss, time 2002ms
rtt min/avg/max/mdev = 0.542/0.631/0.689/0.063 ms
NOTE: SSH vs SSHd
SSHd specifically means the Secure Shell service. SSH (without the “d”) can refer to the SSH protocol itself (noun) or the act of logging into another computer using the SSH service (verb); e.g., “SSH into the web server”.
Afterwards, SSH into the server with the remote host’s username and address: ssh <Username>@<IPaddress>.
user@laptop:~$ ssh [email protected]
The authenticity of host '10.0.0.2(10.0.0.2)' can't be established.
ECDSA key fingerprint is SHA256:euhdoOmTSeiG7p+su5FDWdxSrumKIAQX2VcraoLS8iY.
Are you sure you want to continue connecting (yes/no)? yes
Warning: Permanently added '10.0.0.2' (ECDSA) to the list of known hosts.
[email protected]'s password:
Last login: Sat Jul 11 13:54:12 2020 from 192.168.1.100
[penguin@centos07 ~]$
NOTE: Key Fingerprint
If it’s this computer’s first time logging in to the remote host, you may get an authenticity prompt that you should accept by typing yes.
Type in the remote user’s password and check the hostname to verify that you’ve logged in correctly:
[penguin@centos07 ~]$ hostname -f
centos07.domain.lan
If it’s the name of the remote server, you’re in!
CONCLUSION
By installing the SSHd service and configuring it correctly, we can now access this server remotely over the network! These simple steps can be repeated to help us reach any CentOS 7 server:
- Check Network
- SSHd setup
- Log In Remotely
For additional convenience and security, a good next step would be to set up SSH keys. Feel free to leave a comment.

