
Photo from Pexels by Samer Daboul
On Linux systems, there are an astounding amount of plain text configuration files that determine how the system and various services behave. As such, it’s important to know how to create and edit them. When I was first starting out, I used nano because it was familiar and simple to pick up; although, while many people use nano, I now prefer Vim. Vim is arguably more difficult to learn because it’s not intuitive; however, once you get used to it, I believe it has a lot of useful functionality to offer.
OVERVIEW
In this post, we will cover the basics of how to edit plaintext files with Vim. This will enable us to modify configuration files, executable code, and more.
Outline
- Installation
- CentOS
- Ubuntu
- File Selection
- Create Files
- Edit Files
- Modes
- Normal mode
- Insert mode
- Visual mode
- Common Vim Commands
- Delete
- Find/Search
- Mass Indent
- Undo
- Vim Configuration
- vimrc Overview
- Global vs. Local Configuration
- Common vimrc Edits
- Changing the Color Scheme
- Case Insensitive Searching
- Setting the Tab Stop
Prerequisites
INSTALLATION
Much of the time, Vim will already be pre-installed; if not, it’s simple enough to install it. While the following examples are tested with CentOS 7 and Ubuntu 18.04, the steps should be the same for similar distributions.
NOTE: Vi
Before Vim, there was Vi. Vim stands for “Vi iMproved” and, as expected, is an enhanced version of the original “Vi” text editor.
CentOS
On CentOS systems, you can install software with the yum package manager: sudo yum -y install <SoftwarePackage>.
[penguin@centos07 ~]$ sudo yum -y install vim
Loaded plugins: fastestmirror
Loading mirror speeds from cached hostfile
 * base: centos-distro.1gservers.com
 * extras: mirror.rackspace.com
 * updates: mirror.rackspace.com
Resolving Dependencies
...
Dependency Installed:
  gpm-libs.x86_64 0:1.20.7-6.el7                       perl.x86_64 4:5.16.3-295.el7
  perl-Carp.noarch 0:1.26-244.el7                      perl-Encode.x86_64 0:2.51-7.el7
  perl-Exporter.noarch 0:5.68-3.el7                    perl-File-Path.noarch 0:2.09-2.el7
  perl-File-Temp.noarch 0:0.23.01-3.el7                perl-Filter.x86_64 0:1.49-3.el7
...
Complete!
Ubuntu
On Ubuntu systems, you can install software with the apt package manager: sudo apt-get -y install <SoftwarePackage>.
penguin@ubuntu1804:~$ sudo apt-get -y install vim
...
FILE SELECTION
Create Files
To create a file with Vim, simply type vim followed by the file path. This will automatically open the Vim interface where you can begin to edit the file: vim </path/to/new/file>.
[penguin@centos07 ~]$ vim /tmp/foo.txtThe interface will display a bunch of ~ and the filename at the bottom:
~
~
~
...
~
~
~
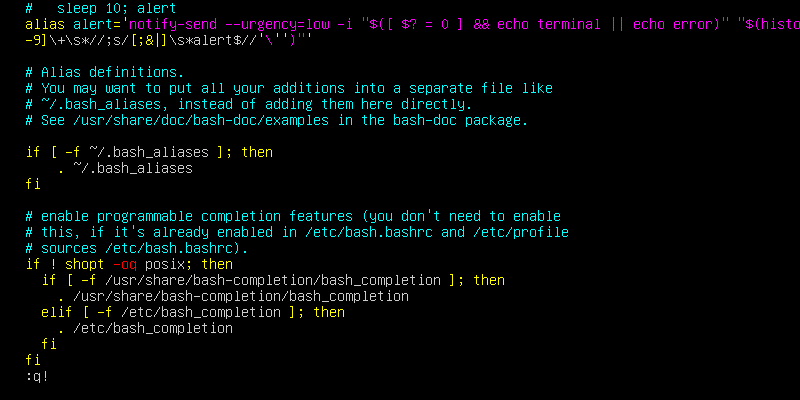
"/tmp/foo.txt" [New File] 0,0-1 All For now, return to the shell by exiting the Vim interface without saving: type :q! and hit Enter.
:q!NOTE: Command Dissection
The : indicates a Vim command to be run; the q is the “quit” command; the ! means force the command (don’t ask for verification).
If you type :q! and it doesn’t appear at the bottom, you’ve likely entered a different Vim mode (more on this later). To fix this, hit the Escape key a few times to back out into “Normal” mode.
Edit Files
Similar to creating a new file, to edit an existing file, just specify the existing file’s path: vim /<PathToExistingFile>:
[penguin@centos07 ~]$ vim ~/.bashrcGo ahead and exit this file without editing: type :q! and hit enter.
.bashrc file except for the :q at the bottom – this is a Vim interface command you would type.MODES
The Vim interface has several modes. Depending on which mode you are currently using, you can either execute Vim commands, type text, search for text, highlight text, or more. We’ll be covering three different modes: Normal, Insert, and Visual. By default, when first opening Vim, you are in “Normal” mode.
Normal Mode
From “Normal” mode, you can move the cursor around and execute vim commands.
NOTE: Normal Mode
“Normal” mode is also known as “Command” mode.
Traditionally, to move the cursor around in Vim, you would use the h, j, k, and l keys:
h= move cursor leftj= move cursor downk= move cursor upl= move cursor right
Alternatively, depending on the version of “Vi” or “Vim”, you can just use the arrow keys.
Insert Mode
To begin editing a file with Vim, you’ll need to enter “Insert” mode. First, open the file you want to edit: vim /<FileToEdit>.
[penguin@centos07 ~]$ vim /tmp/foo.txtFrom “Normal” mode, just hit i to enter “Insert” mode (you should see -- INSERT -- at the bottom of the terminal). Now, you can begin typing out text much like a basic GUI text editor.
Hello World!
~
~
...
~
~
-- INSERT --
To get back to “Normal” mode, so you can execute Vim commands again, press Escape. From here, to save any edits you’ve made in the current Vim session, execute the :w command to “write” (save) your progress.
:wWhen you’re done editing a file, you can combine the save and exit commands together: :wq!. This will “write” and “quit” forcefully at the same time.
:wq!Visual Mode
To enter “Visual” mode, hit v, shift-v, or ctrl-v. From here, you can move the cursor around to highlight text and execute a command on the selection.
NOTE: Visual Modes
> Entering “Visual” mode with v: This will highlight everything from where your cursor starts to where you move the cursor.
> Entering “Visual” mode with ctrl-v: This will highlight blocks of text – one corner of the block is where the cursor started, the opposite corner will be where you move the cursor.
> Entering “Visual” mode with shift-v: This will highlight entire lines of text. The first line is where your cursor starts, the last line is where your cursor ends.
Again, hit Escape to exit back to “Normal” mode.
COMMON VIM COMMANDS
Delete
While in “Insert” mode, you can hit Backspace to delete characters as expected. In “Normal” mode, however, you have a few quick shortcuts available.
Shortcut examples:
- Type
shift + d: Deletes all characters from your cursor’s position to the end of the line - Hit
d, thenup: Deletes current line and line above. - Hit
d, thendown: Deletes current line and line below.
NOTE: Deleting Multiple Lines
You can also use “Visual” mode to mass delete multiple lines:
1. From “Normal” mode, move the cursor up/down to the first line you want to delete.
2. Hit shift + v to enter “Visual” mode (you’ll see the current line becomes highlighted).
3. Move the cursor up/down to select the remaining lines you want to delete.
4. Hit d to delete each highlighted line.
Find/Search
Searching is invaluable in large text files with hundreds of lines, or more. From “Normal” mode, to search for a word, type / followed by the word/string you want to search for: /<SearchWord>. For example, to search for the word “error”:
/errorKeep in mind, this is a case-sensitive search.
Mass Indent
When typing out certain text, like code, you may wish to indent a section of text. To do this, you’ll need to execute a series of steps:
- From “Normal” mode, move the cursor up/down to the first line you want to indent.
- Hit
shift + vto enter “Visual” mode. - Move the cursor up/down to select the remaining lines you want to indent.
- Hit
shift + >to insert aTabat the beginning of each highlighted line.
Undo
During any of the above actions – typing, deleting, indenting, etc. – you can hit u to undo them and ctrl + r to redo them. Keep in mind, this will only work for the current Vim session; so, if you exit Vim, it will forget all the “undo/redo” history.
VIM CONFIGURATION
Overview of vimrc
Vim uses a file called “vimrc” to determine what configuration is used when executing the vim command. The file itself contains default settings and explanations.
#) are common syntax for defining comments, the vimrc file uses double-quotes (“) instead.Global vs. Local Configuration
There are two “vimrc” files on the system: global and local. Depending on your specific Vim installation, the global “vimrc” file can typically be found at /etc/vimrc or /etc/vim/vimrc. The local “vimrc” file will be in the user’s home directory as a hidden file: ~/.vimrc.
NOTE: local vimrc
Sometimes, the local .vimrc file may not exist by default, but it can be added if needed.
COMMON vimrc EDITS
Now, we’ll go over some common customization options for Vim via “vimrc” file edits: changing the color scheme, case insensitive searches, and setting the tab stop.
NOTE: vimrc Edits
Most of these edits can be implemented during a running Vim session from “Normal” mode.
Changing the Color Scheme
To change the color scheme, use the :color setting; for example, :color <ColorScheme>:
:color desertSome other options, besides the “desert” color scheme, include “default”, “pablo”, and “evening”.
NOTE: Color Scheme Options
To find available color scheme options, open Vim and, from “Normal” mode, type :colorscheme and hit “tab” to scroll through the options. Take notice of the space after typing :colorscheme.
Case Insensitive Searching
To enable case insensitive searching, include :set ignorecase:
:set ignorecase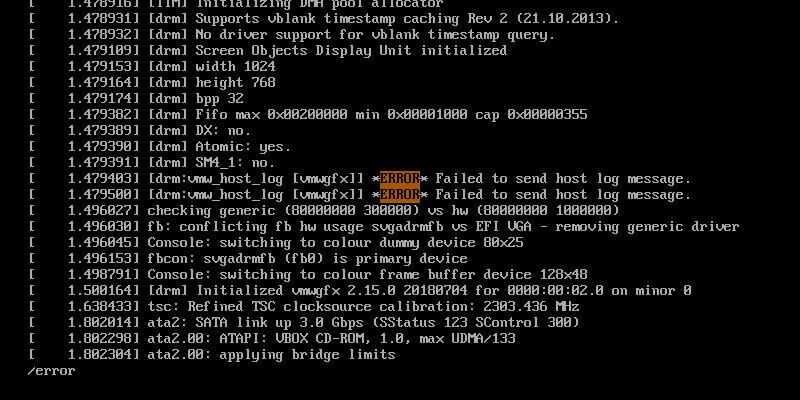
error, the two capital ERROR strings are still considered a match.Setting the Tab Stop
To define how many spaces are used when hitting tab in “Insert” mode, use :set tabstop=<N>, where “N” is how many spaces you wish to use:
:set tabstop=2If you use the above example, hitting Tab will now indent by two spaces.
CONCLUSION
Should you use Vim instead of Nano to edit system files? I can’t answer that for you, but now you know enough basics of Vim to try it out and decide for yourself!:
- Installation
- File Selection
- Vim Modes
- Vim Commands
- Vim Configuration
- Vim Config Edits
For further Vim customizations, try reading the global vimrc config and uncommenting certain options.